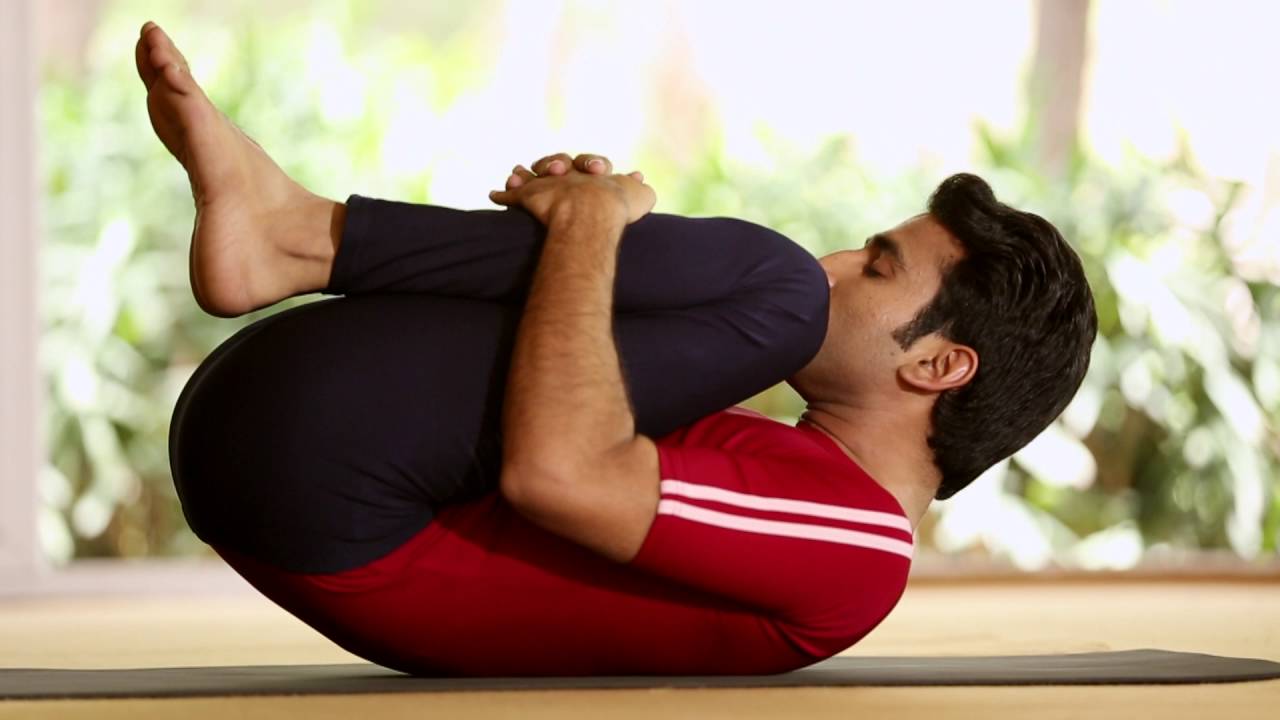
Pavanamuktasana (Wind relieving pose) Pavanamuktasana comes from the Sanskrit, “Pavana mukta ” meaning “Wind relieving”,and “Asana”, meaning “Posture”.
Steps with breathing
1. Lie flat on the back with legs together and straight. The arms should be by the sides, palms facing down, head, neck and spine should be in a straight line.
2. Inhale deeply, bend both the knees and bring the thighs closer to the chest. Interlock the fingers and clasp the hands on the shin bones just below the knees. While exhaling, raise the head and shoulder and try to place the chin in the space between the two knees. Maintain the asana from 30 seconds to a minute.
3. Slowly lower the head, shoulders and legs and rest in shavasana.
Adjustments
1. You can either interlock your fingers or hold the elbows of the opposite arm.
2. Try to keep your lower back well grounded on the floor.
3. As you exhale, tighten the grip of the hands on the knee and increase the pressure on the chest.
4. It is important to start with the right leg because it presses the ascending colon directly. follow with the left leg which presses the descending colon directly.
Variations
1. Eka Pada (single leg) Pavanamuktasana.
2. Pawanamuktasana without raising the head.
Benefits
1. Strengthens the lower back muscles.
2. It massages the abdomen and digestive organs and is therefore very effective in removing wind and constipation.
3. It strengthens the reproductive organs and also useful for impotence, sterility and menstrual problems.
Contraindications
1. Not to be performed by the people suffering from high blood pressure.
2. Serious back conditions such as sciatica and slipped disc.
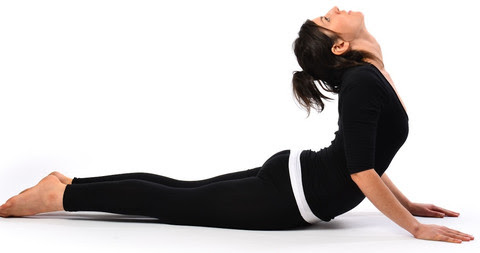
The bhujangasana name comes from the Sanskrit, “Bhujanga ” meaning “Cobra”,and “Asana”, meaning “Posture”.
Steps with breathing
1. Begin in prone position lie on your stomach with your toes flat on the floor and forehead resting on the ground.
2. Slowly bring the chin on the mat, keep the palms beside the shoulder level facing forward and draw your elbows towards the side of the body.
3. With inhalation push down through the palms and lift the chest slowly up towards the ceiling and maintain the final pose from 30 seconds to one minute.
4. While exhaling slowly bring the chest down and relax in makarasana.
Adjustments
1. Feet flat on the floor.
2. Palms right beside the shoulder level and while lifting the chest up, keep the navel on the floor.
3. Shoulders away from the ears and broaden the collar bones.
4. Press the pubic bone.
5. Neck should be neutral.
Variations
1. Baby cobra (resting on the elbows).
2. Lift the arms off the floor.
https://www.youtube.com/watch?v=h2lj2z8gg0w
Benefits
1. Brings rich blood supply to the spine, hence, keeps the spine supple and healthy.
2. Beneficial for all the abdominal organs, especially the liver and the kidneys.
3. It alleviates constipation.
4. It tones the ovaries and uterus and helps in menstrual and other gynecological disorders.
Contraindications
1. People suffering from peptic ulcer, intestinal tuberculosis, or hernia and people who recently underwent abdominal surgeries should avoid this asana.
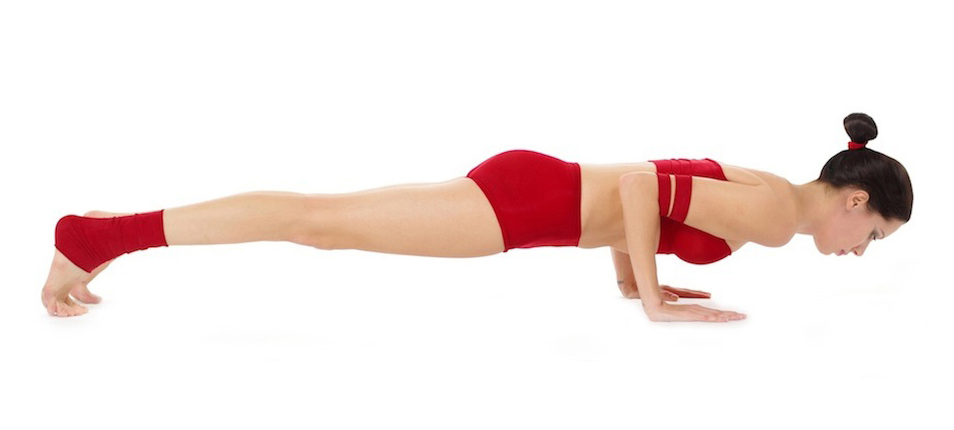
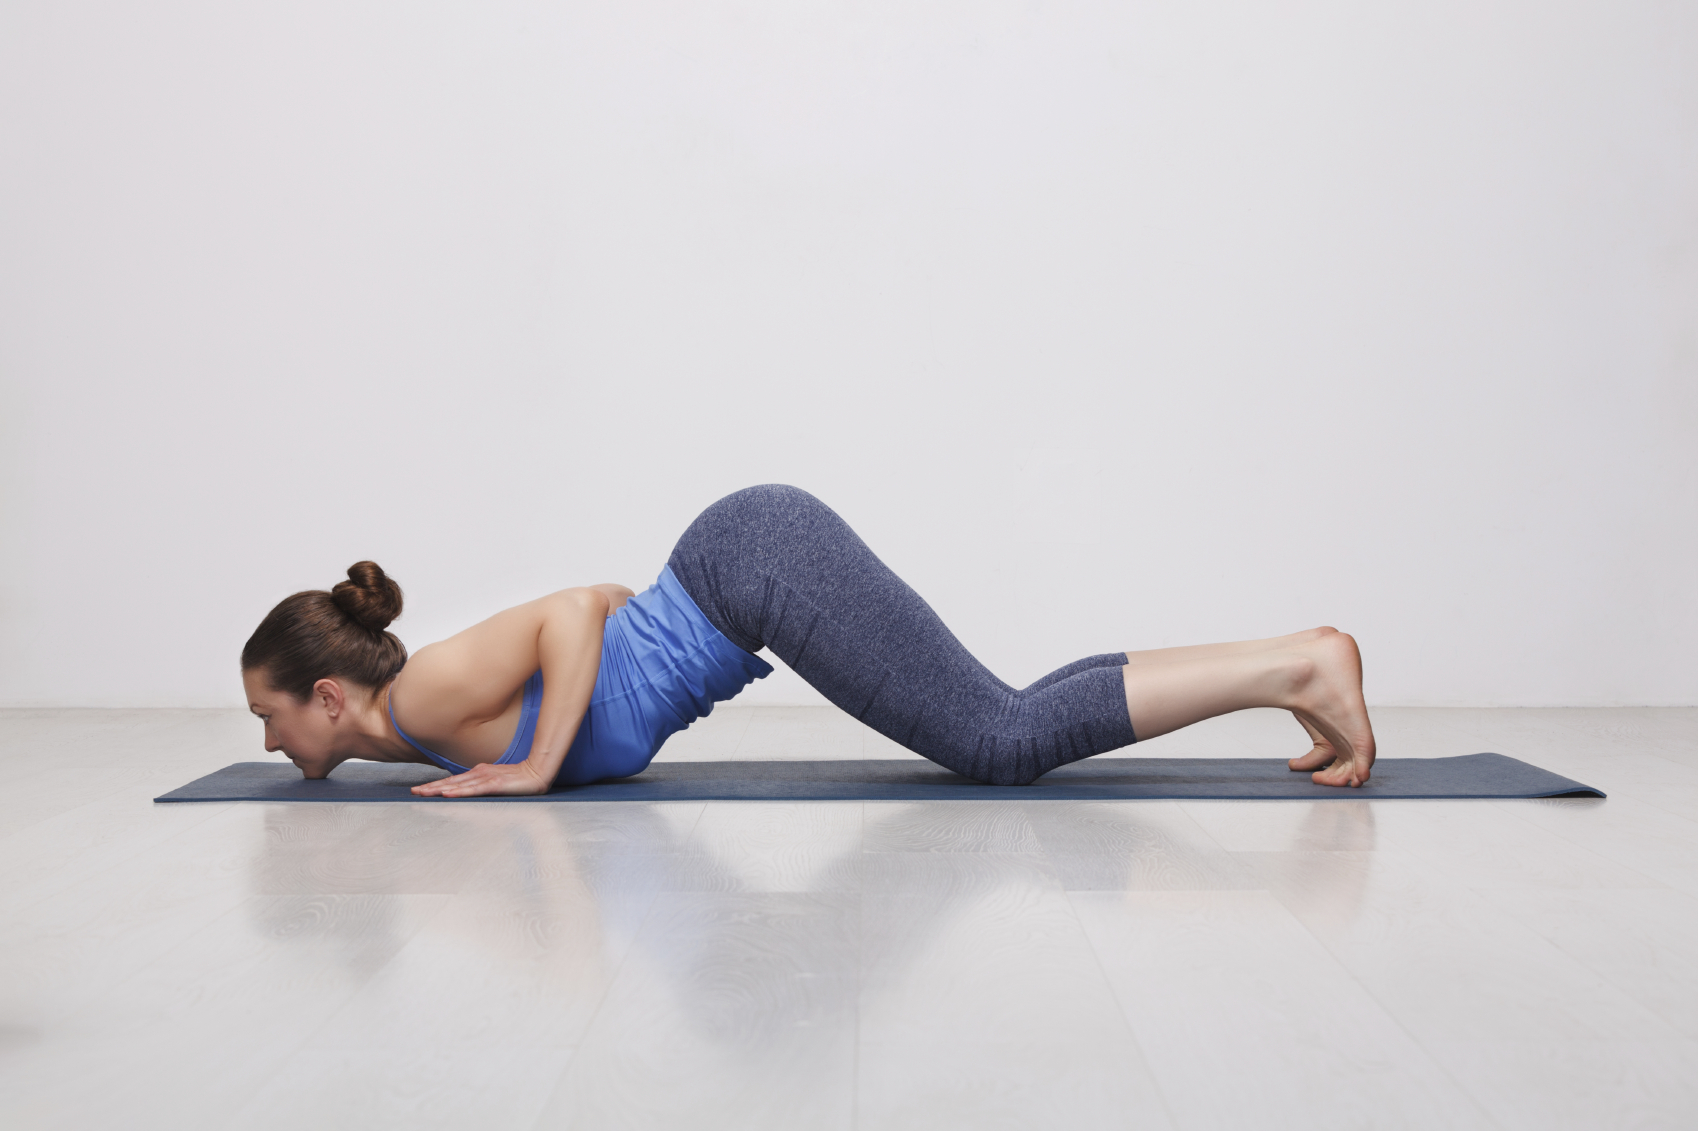
The Chaturanga Dandasana name comes from the Sanskrit, “Chat ” meaning “four”, “Anga ” meaning “Limbs”,“Danda ” meaning “Staff”and “Asana”, meaning “Posture”.
Steps with breathing
1. Start with dandasana and slowly come in with vajrasana (heels beneath the hips) and walk your hands all the way forward until torso is parallel to the floor (also called table top position).
2. Now tuck the toes, bring the upper torso down and lift the knees off the floor.
3. In the final posture 4 limbs of the body should be in contact with the floor i.e. feet and palms. Maintain the final pose from 30 seconds to one minute.
4. Slowly bring the knees down, lift the upper torso up, release the toes and rest in shishu asana.
Adjustments
1. The feet should be placed approximately hip width apart.
2. Neither the shoulders nor the lower back should sink down.
3. Avoid lifting of the hips up.
4. Should maintain the 90degree angle between the shoulder and the elbow.
5. Core should be engaged.
Variations
1. Utthita chaturanga dandasana (extending the elbows).
https://www.youtube.com/watch?v=pqLnAQ58YLk
Benefits
1. The pose strengthens the arms and the wrists and develop mobility and power.
2. It also contracts and tones the abdominal organs.
3. It tones and strengthened the spinal muscles.
Contraindications
1. People suffering from carpel tunnel syndrome and shoulder dislocation should avoid this asana.
Our Ashtanga Yoga Teacher Training in Goa embraces the pure essence of this ancient practice, free from lifestyle gimmicks and commercialization. Ashtanga Yoga is the heart and origin of many modern yoga styles, and at AdiYogam, you can immerse yourself in its traditional wisdom. Curious about what makes Ashtanga Yoga unique? Experience the power of concentration firsthand by joining our flow classes. Discover the true path of yoga with us.
What is Ashtanga Yoga?
Ashtanga Yoga is a profound and challenging system of Hatha Yoga that originates from India. It primarily focuses on Asana (poses) and Pranayama (breathing control). This ancient practice is renowned for its sophistication and demands a high level of commitment. At its core, Ashtanga Yoga involves synchronizing the breath with a series of dynamic yoga postures. While there are six series in total, most practitioners focus on the primary series known as ‘Rog Chikitsa,’ which translates to ‘disease treatment’ in Sanskrit. This foundational series is often the starting point for those embarking on their Ashtanga Yoga journey.”
Ashtanga Namaskara (Eight limbed pose)
The name comes from the Sanskrit, “Ashtanga ” meaning “Eight limbs”, “Namaskara ” meaning “Salutation”,and “Asana”, meaning “Posture”.
Table of Contents Ashtanga Namaskara
Steps with breathing
Adjustments
Benefits
Contra Indications
Variations
Ashtanga Yoga Teacher Training: Find Harmony in Goa, India
Ashtanga Yoga Teacher Training in Goa is gaining popularity worldwide. Known for its intense postural exercises, it is a top choice for athletes and gymnasts. However, this practice is not for the faint-hearted, as it requires dedication and discipline. The primary goal of Ashtanga Yoga is to enhance body flexibility, leading to increased strength. Unlike other forms of yoga, Ashtanga follows a specific sequence of postures, emphasizing the importance of order.
One of the remarkable benefits of Ashtanga Yoga is its ability to reduce mental stress, a significant contributor to premature ageing. Through meditation, practitioners find relief from worries and anxiety. Ashtanga Yoga, along with Sivananda and Vinyasa flow, emphasizes the deep connection between breath, body, mind, and soul. Achieving harmony through controlled breath and steady postures is the essence of these practices.
The poses involved in Ashtanga Yoga offer a wide range of advantages, including stress reduction, muscle toning, weight management, muscle tension relief, joint lubrication, improved circulation, and gentle massage of internal organs.
Discover the transformative power of Ashtanga Yoga at our Teacher Training in Goa and embark on a journey to better health and well-being.”
“Embark on a Journey of Serenity: Yoga Retreats in Goa, India
In today’s fast-paced world, stress and tension have become a part of our daily lives. However, there’s no need to worry. When the weight of the world feels heavy, consider planning a trip to Goa, India. Goa offers a range of Ashtanga Yoga courses that allow you to not only enjoy your vacation but also rejuvenate your mind and body through regular yoga practice.
Yoga has the power to alleviate stress, enhance your mental well-being, and boost your nervous system’s strength. It goes beyond just addressing depression; it also helps detoxify your body and brings a sense of calm to your mind. A trip to Goa, combined with regular yoga practice, can leave you feeling vibrant and full of life.
Yoga practice is all about achieving a state of relaxation and inner peace. There are various yoga methods to choose from, but all share the goal of calming both the body and mind. To make the most of your practice, it’s essential to find a quiet place with no distractions. And what better place to do so than at AdiYogam in Arambol, nestled in the Orchid Land of Goa? Here, you can enjoy a trip that not only relaxes your body but also nourishes your soul, leaving you refreshed and rejuvenated.”
“Is Ashtanga Yoga in Goa Suitable for Beginners?
Ashtanga Vinyasa yoga has garnered a growing following in recent times, making it a popular choice for individuals, gyms, and corporate offices. This yoga style is seen as a unique combination of postures that can help address various health and fitness issues. As its popularity continues to rise, so does the demand for qualified instructors.
Ashtanga Yoga Teacher Training in Goa is known for its athleticism and vigour. This training may be the right fit for you if:
1. You prefer structured and systematic exercise routines.
2. You enjoy taking on challenges independently.
While many yoga studios offer Ashtanga Yoga classes at the beginner level, it’s important to note that if you’re new to yoga or have been practising on your own, it’s wise to start with introductory classes before diving into Ashtanga Yoga in Goa.”
Steps with breathing of Ashtanga Namaskara
1. Start with dandasana and slowly come in vajrasana (heels beneath the hips) and walk your hands all the way forward until torso is parallel to the floor (also called table top position).
2. Lower your chest towards the floor till it reaches to the mat placing it between the hands press your toes against the mat and touch the chin to the floor.
3. It the final posture all the 8 limbs of the body i.e. the two feet, both the knees, both the palms, the chest and the chin, should be in contact with the floor.
4. Slowly lift your chin and chest up, straighten your elbows and walk your hands back and sit in vajrasana or relax in shishu asana (child’s pose).
Adjustments
1. Wrist underneath the shoulder (arms and knees are perpendicular).
2. Toes pressing against the ground.
3. Elbows closer to the torso.
4. Reach your tailbone towards sky.
Variations of Ashtanga Namaskara
lying on the belly by keeping hands by the side of the chest is one best variation available.
https://www.youtube.com/watch?v=M6rqwiO5wY4
Benefits
1. This pose strengthens the leg and arm muscles.
2. It develops the chest and improves the flexibility of the spine.
3. Works and improves the muscles of all the eight limbs.
Contraindications
1. People with serious neck, shoulder, back problems and wrist injury should not do this practice.
2. People suffering from carpel tunnel syndrome.
3. High blood pressure and
4. Pregnant women should avoid this asana.
Compelling Reasons to Enroll in Ashtanga Yoga Teacher Training in Goa
Ashtanga Yoga places a strong emphasis on enhancing an individual’s flexibility, breathing, and inner peace. Here are some compelling reasons why you might become addicted to Ashtanga Yoga Teacher Training in Goa:
1. Holistic Health Improvement: Ashtanga Yoga Teacher Training in Goa addresses physical, mental, emotional, and spiritual aspects of your well-being, promoting overall health.
2. Self-Care: This training encourages self-care and self-awareness. It fosters a deep connection with your body and mind, making you feel complete.
3. Rediscover Youthfulness: Ashtanga Yoga strengthens your body and alleviates both physical discomfort and mental worries, making you feel rejuvenated and youthful.
4. Enhanced Energy Levels: The practice of binding breath with movements (Vinyasa) in Ashtanga Yoga leads to increased energy levels, heightened sensory experiences, and a happier life.
5. Emotional Mastery: Regular and disciplined practice helps calm the mind, reducing the frequency and intensity of emotional outbursts. It enhances your Emotional Quotient (EQ), a valuable asset in today’s fast-paced world.”
Ashtanga Yoga Teacher Training in Goa offers a holistic approach to well-being, transforming not only your physical health but also your mental and emotional states. It empowers you to rediscover your youthful vitality, increase your energy levels, and master your emotions. By enrolling in this training, you embark on a journey of self-discovery and self-care, embracing a healthier and happier life. Experience the profound impact of Ashtanga Yoga on your overall health and vitality in the serene and vibrant setting of Goa. Join us and become a certified Ashtanga Yoga Teacher in this transformative journey of body and mind.”
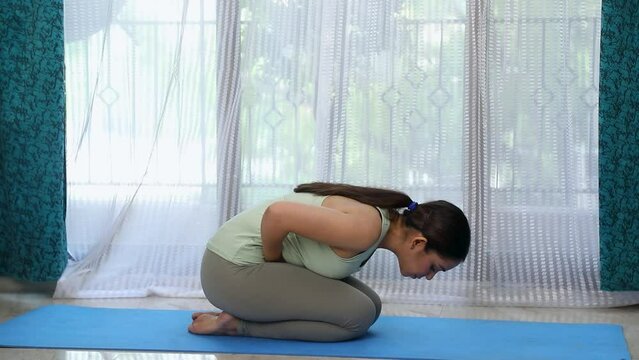
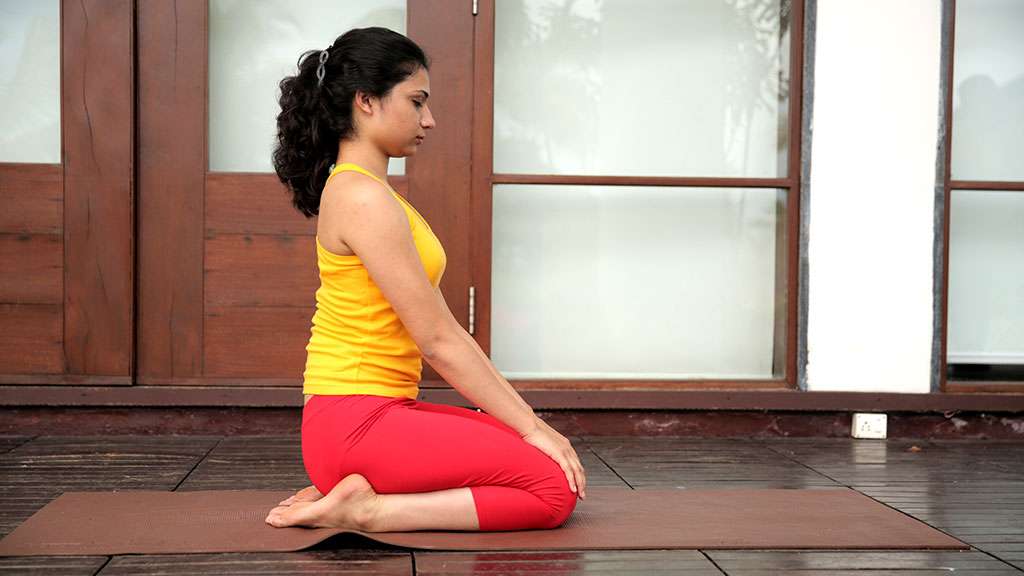
The Vajrasana name comes from the Sanskrit, “Vajra ” meaning “Diamond”, and “Asana”, meaning “Posture”.
Vajrasana or thunderbolt is said to be the weapon of lord Indra, king of the devas or gods, just as the mind is the king of all the senses. Vajrasana is also the major nadi directly connected with the genitourinary system, which regulates the sexual energy in the body. Control of vajra nadi leads to sublimation and control of sexual energy.
Steps with breathing
1. Sit in dandasana and slowly bend your knees one by one and keep it beneath the buttocks, toes pointing out behind.
2. Sit on the heels with the calves beneath the thighs.
3. Sit straight with spine, neck and head in one line and palms on the knees facing downwards.
4. Stay in normal breath for about 30 seconds to 1minute, slowly can increase the duration. Slowly extend the legs one by one and relax back in shithala dandasana.
Adjustments
1. Big toes touching each other.
2. Four finger gap between the kneecaps.
3. Head, neck and spine should be erected and shoulders rolled back.
Variations
1. Spread both the heels out on the side and place buttocks between on the ground.
2. Knees wider and toes together.
3. Being in vajrasana lieing down on back which is called as Supta vajrasana.
4. Those have knee pain in this posture can put pillow or bolster under the buttocks.
Benefits
1. Vajrasana alters the flow of blood and nervous impulses in the pelvic region and strengthens the pelvic muscles.
2. It is a preventative measure against hernia and helps to relieve piles.
3. It reduces the blood flow to the genitals and the nerve fibres which feed them, making it useful in dilated veins of the testicles and hydrocele in men.
4. It alleviates menstrual disorders.
5. It increases the efficiency of the entire digestive system, relieving stomach ailments such as hyperacidity and peptic ulcer.
Contraindications
1. Do not practice vajrasana until the ankles and knees are sufficiently flexible.
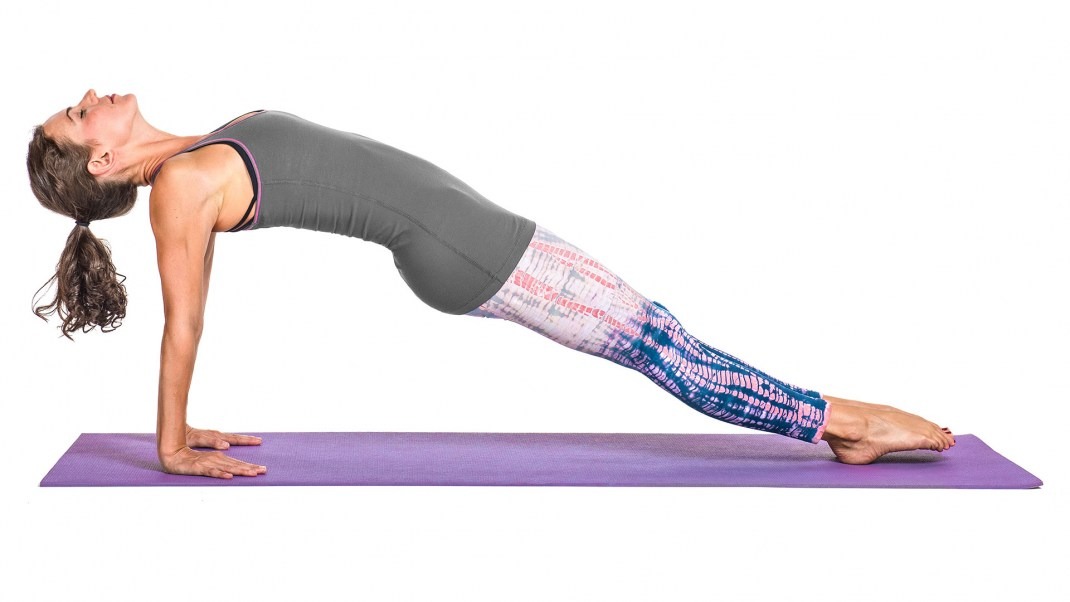
The Ardha Purvottanasana name comes from the Sanskrit, “Ardha ” meaning “Half”, “Purva ” meaning “East”,“Uttana ” meaning “Intense” and “Asana”, meaning “Posture”.
Steps with breathing
1. Sit in dandasana with the legs stretched straight in front. Place the palms on the floor by the side of the hips.
2. Now, slide the palms behind the buttocks, inhale and bend both the knees at the chest level.
3. Widen the feet hip/ shoulder width apart and take the pressure of the body on the hands and feet.
4. While inhaling lift the body off the floor until parallel to the floor, straighten the arms and keep the elbows tightened.
5. Stretch the neck and relax the head as far back as possible and stay in this posture from 30 seconds to one minute.
6. While inhaling, bring the neck forward, lower the buttocks on the floor and relax in shithala dandasana.
Adjustments
1. Feet should be hip/ shoulder width apart.
2. Arms and shin bone should be perpendicular to the floor.
3. Thighs and torso should be parallel to the floor.
4. Fingers pointing forward towards the toes and neck neutral.
Variations
1. In ardha purvottanasana try to raise one leg towards the ceiling and bring it parallel to the floor.
2. Straighten the legs one by one and try to touch the ball of the feett on the floor for purvottan asana.
3. it’s completely fine to point the fingers either front or backwards.
4. Beginners can try to lift the buttocks only a few inches off the floor.
https://www.youtube.com/watch?v=lQNmjbVXeuA
Benefits
1. Strengthens the arms, wrist ankles and legs.
2. Builds and tones the core muscles.
3. Stretches the shoulders and chest.
4. Relieves fatigue and stress.
Contraindications
1. This asana should not practiced by those with high blood pressure,
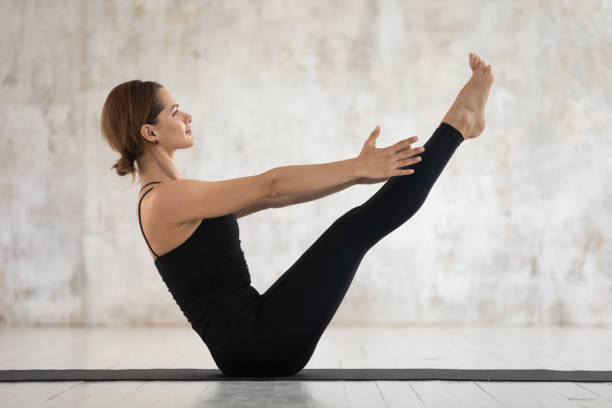
The Navasana name comes from the Sanskrit, “Nava” meaning “Boat” and “Asana”, meaning “Posture”.
Steps with breathing
1. Sit in dandasana, stretch the legs out in front and keep them straight. Keep the palms beside the hips.
2. Now, slide the palms behind the buttocks, inhale and bend both the knees at the chest level.
3. Firm the palms on the mat and while exhaling raise both the legs from the floor. If possible raise both the hands in line with the outer edge of the knees, palms facing each other.
4. Balance the whole body on the buttocks and engage the core muscles.
5. After holding the pose from 30 seconds to one minute,with inhalation bring the hands back behind the buttocks and with exhalation bring the legs down and rest in shithala dandasana.
6. Do not hold the breath during this asana, through the tendency is always to do it with suspension of breath after inhalation. If the breath is held, the effect will be felt on the stomach muscle which just external surface and not on the abdominal organs. Deep inhalation in this asana would loosen the grip on the abdominal organ. In order to maintain this grip, inhale, exhale and go on repeating this process . This will exercise not only the abdominal muscles but the internal organs also.
Adjustments
1. Slide the palms 30 degree away from the buttocks.
2. Balance of the whole body should be on the buttocks.
3. Toes of the feet should be in line with the head.
4. Spine should be erected and core muscles should be engaged.
Variations
1. Slide the palms behind the buttocks, inhale and bend one knee and slowly extend the leg, keeping the other leg on the floor and lift the hands off the floor.
2. Those who cannot balance on the buttocks can keep the palms on the floor while the legs are up.
Benefits
1. Strengthens abdomen, hip flexor and spine.
2. Stimulates the muscular, digestive and circulatory system.
3. Tones all the organs and removes lethargy.
4. It also helps to strengthen the back muscles.
5. It is especially useful for eliminating nervous tension and bringing about deep relaxation.
6. It is useful for women preparing for childbearing and may be practiced during the second trimester of pregnancy and should be parcticed under expert only.
Contraindications
1. People suffering from high blood pressure should avoid this asana.
2. Should not practice during menstruation and pregnancy (please check benefits).
3. Those who are suffering from diarrhoea, dysentery, leucorrhoea, mono-metrorrhagia and dysmenorrhoea should not attempt this asana at all.
The Gomukhasana name comes from the Sanskrit, “Gow” meaning “Cow” “Mukha ” meaning “Face”and “Asana”, meaning “Posture”
Steps with breathing
1. Sit in dandasana, legs stretched straight out in front of the body.
2. Bend both the knees at the chest level, feet on the floor (knees slightly close to the chest).
3. Take the left foot under the right knee and right knee over the left knee.
4. Both the heels of the feet should be supinated (facing towards ceiling).
5. Inhale and extend left arm at the shoulder level palms facing the ground, now while exhaling rotate the left palm inversely (as palm facing backwards) by flexing your elbows sweep your arm behind your torso. The back of your hand will be between your shoulder blades.
6. Inhale and extend right arm at the shoulder level and while exhaling rotate your palm externally.
7. Slowly extend the right arm over your head and bend the elbow to reach down towards the left hand. If possible, hook your right and left fingers. Stay in this pose and focus on your breathing for approximately 30 seconds to 1 minute.
8. Slowly release both the arms and knees one by one and relax in shithala dandasana.
Adjustments
1. Both the heels of the feet are supinated and try to keep the knees one on one in a line.
2. Try to keep your heels equidistant from your hips.
3. Align both the elbows in a line.
Variations
1. Variation of this pose is to tuck both the heels under the buttocks rather than leaving them next to your hips.
2. After interlocking the hands behind the back, lean forward and try to touch the chin to the knee.
3. If beginners are not able to clasp the fingers then use a rope or belt to pull the both hand’s fingers close.
4. It’s quite challenging for beginners to spread the weight evenly on your buttocks in that case you can use towel to make it even.
Benefits
1. Gomukhasana is an excellent asana for inducing relaxation. If practiced for 10 minutes or more, it will alleviate tiredness, tension and anxiety.
2. It promotes mobility of shoulders and hips.
3. Strengthens ankles, thighs, hips, chest, neck and arms.
4. Stimulates the function of kidneys.
5. Activates the bladder and the digestive system.
Contraindications
1. People suffering from shoulder, neck, hip, knee pains.
2. Sciatica must practice under extert teacher.
3. Injury at the hamstring and the quadriceps should avoid the asana.
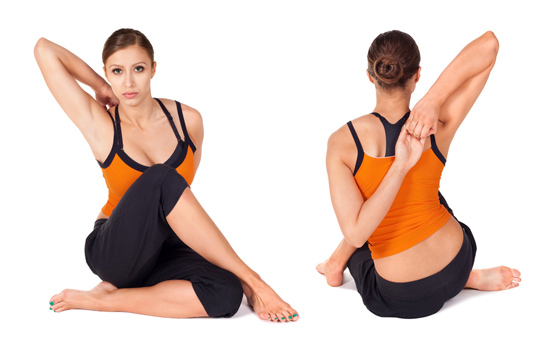
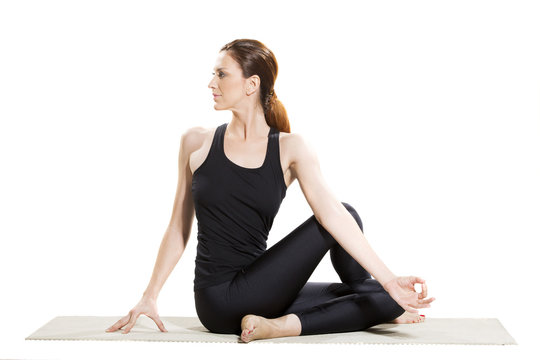
The Ardha Matsyendrasana name comes from the Sanskrit, “Ardha ” meaning “Half” “Matsyendra ” meaning “King of the fish”and “Asana”, meaning “Posture”.
In the Hatha yoga pradipika, matsyendra is mentioned as one of the founder of Hatha vidya. Paripurna matsyendrasana, where the spine is given the maximum lateral twist, whereas matsyendrasana is a milder version of that asana. In English, it is called half Lord of the Fishes Pose.
Steps with breathing
1. Sit in dandasana, feet together legs stretched out straight in front, and spine erect.
2. Bend both the knees at the chest level, place the right foot under the left knee outside the left hip and the left foot over the outer edge of the right knee, toes pointing forward.
3. Place the left hand behind the hip and lengthen the tailbone.
4. Inhale; raise your right hand over the head palm facing the right side. As you exhale bend your elbow taking it outside of the left knee and wrap the left arm behind the back.
5. Lengthen both sides of the torso and give a slight twist and look at your left shoulder.
6. Maintain the final pose from 30 seconds to a minute.
7. Inhale bring the neck forward, as you exhale take your right elbow out and release the left arm. With further exhalation lift the left knee up followed by the right knee at the chest level and relax in shithala dandasana.
Adjustments
1. The foot that is in contact with the outer edge of the knee, its toe should point outward.
2. The heel of the other foot should be touching the outer edge of the hip.
3. Lengthen the spine and lift the tail bone up, so that the entire torso revolves around the spine.
Variations
1. Hug the knees.
2. Cath hold of the big toes.
3. Clasping the hands.
Benefits
1. Improves the function of the digestive system.
2. Increases flexibility of the spine and back muscles.
3. Massages and stimulates the pancreas.
4. Increases the oxygen supply to the lungs.
5. It also helps to reduce the size of the abdomen.
Contraindications
1. Women who are pregnant.
2. Menstruation cycles.
3. People suffering from peptic ulcer, hernia, slipped disc and sciatica should also avoid it.
4. People suffering from hyperthyroidism should only practice this pose under the guidance of a competent teacher because of the intense twist in the neck twist and abdominal.